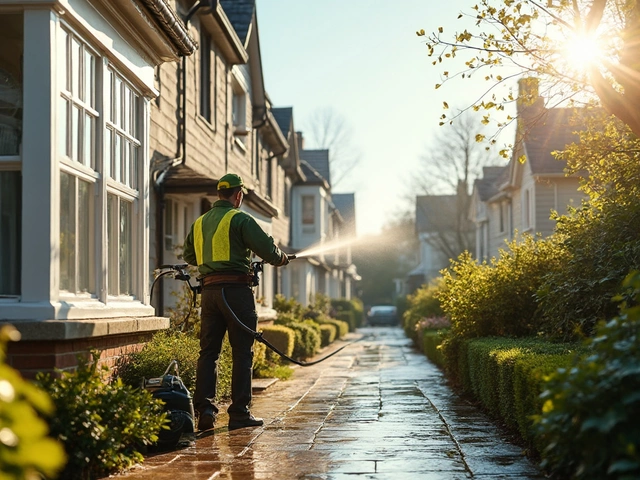
Ever stood in front of your driveway, power washer in hand, and wondered if blasting away all that grime is actually safe? You’re not alone. Pressure washers have become the go-to tool for quick, dramatic clean-ups, but those high-powered jets can be a double-edged sword—especially if you’re not paying attention to what your driveway is made from or how you’re using the machine.
It’s easy to think, "The more power, the cleaner my driveway will look." But cranking up the pressure or getting too close to the surface can actually chew up your concrete or brick, leaving behind pitting, streaks, or even loose chunks. Not exactly the curb appeal you had in mind.
Here’s the thing: not all driveways react the same way to pressure washing. Some materials shrug it off. Others? Not so much. If you know what you’re working with, you can figure out how to get that spotless look without ruining your investment. And if you’re new to pressure washers, it pays—literally—to skip rookie mistakes that lead to repairs later.
Pressure washing, or power washing, is all about using a high-powered jet of water to blast away dirt, stains, moss, or even old paint. A typical pressure washer pushes water out at anywhere from 1,300 to over 3,000 PSI (pounds per square inch), which gives it the muscle to scrub things you couldn’t clean by hand. That’s why pressure washing is so popular for stubborn gunk on concrete driveways or brick walkways.
The spray comes out of a narrow wand, letting you control where the water hits. Most machines have adjustable nozzles that change the width and force of the jet. Some models offer a wide spray for general cleaning, while closer and narrower tips mean more concentrated—or more aggressive—cleaning. The trick? If you aim too close or pick a nozzle with too much power, you might blast more than just the grime, especially on softer driveways.
Here’s a simple breakdown of the process for driveway cleaning:
Some folks add special detergents to tackle oil stains or deep discoloration. But here’s the kicker: detergents do make a difference, and scrubbing with a stiff brush after spraying can give better results than washing alone.
Below is a quick comparison of typical washer PSI ranges for different driveway surfaces:
| Driveway Surface | Recommended PSI |
|---|---|
| Concrete | 2500 – 3000 |
| Brick | 1500 – 2000 |
| Asphalt | 1200 – 1500 |
As you can see, dialing in the power based on your actual driveway material keeps you from accidentally tearing things up. So, before you start blasting away, it’s good to know what you’re working with and match the pressure and technique accordingly.
The type of driveway you have really changes how it handles pressure washing. Concrete, brick, asphalt, pavers—they all react differently to high-pressure water. Knowing what material you're working with is key before firing up the washer.
Let’s break it down:
Here’s a handy cheat sheet so you know what you’re dealing with:
| Material | Pressure Washing Risk | Recommended PSI |
|---|---|---|
| Concrete | Medium—watch for chipping | 2,500–3,000 PSI max |
| Asphalt | High—avoid direct hits | 1,500–2,000 PSI |
| Brick/Paver | Medium—can dislodge bricks or mortar | 1,000–2,000 PSI |
| Gravel | Very high—stones scatter easily | Not recommended |
If you’re not sure about your surface, start at the lowest pressure and test a small patch. Watch for surface flakes, loose sand, or color fading. Use the right nozzle—usually a 25 or 40-degree tip for driveways. That spreads out the water and tones down the risk of damage. Smarter moves mean a cleaner driveway that actually lasts.
A lot of people end up damaging their driveway because they just don’t know what to watch out for with a pressure washing job. The biggest issue? Too much pressure. Most home pressure washers offer adjustable settings, but if you dial it up higher than needed, you might blast away not just dirt but tiny bits of concrete or brick too. This is especially a problem for older driveways, which are already a bit fragile.
Another classic mistake is holding the wand way too close to the surface. If your nozzle is just an inch or two away, you risk etching lines, gouges, and ‘tiger stripes.’ That uneven look doesn’t go away, and you might even make the surface more porous, which means it’ll get dirty faster in the future.
Here are a few other ways folks can mess up their driveway cleaning:
Check out this quick look at pressure levels and risk. Most driveways do fine with 2,000 to 3,000 PSI. Go higher, and you start flirting with trouble:
| Pressure Level (PSI) | Recommended For | Damage Risk |
|---|---|---|
| Less than 1,500 | Wood, soft brick | Low |
| 2,000–3,000 | Standard driveways | Moderate |
| 4,000+ | Heavy-duty, commercial tasks | High |
It’s tempting to go hard and fast, but taking a minute to check your equipment and your surface saves you cash and headaches. Just because these machines can blast through grime doesn’t mean your driveway can always take the hit.
When pressure washing gets too aggressive, your driveway shows it—sometimes right away, sometimes in a few weeks. Noticing these issues early can save you a chunk of cash and hassle. Here’s what you should watch for after using a pressure washing machine on your driveway:
You might think these problems only show up on old or crumbling driveways, but new surfaces can get roughed up, too—especially within the first year before everything’s fully set. Fun fact: according to a 2023 survey from a national home improvement group, around 35% of homeowners reported some form of driveway damage within a year after their first DIY pressure washing session. Ouch.
| Sign of Damage | What It Means | When It Appears |
|---|---|---|
| Pitting | Over-concentration of pressure in one spot | Immediately or within days |
| Etching | Surface layer stripped away | Right after cleaning |
| Loose Pebbles | Surface break-up and loss of aggregates | Within a week |
| Crack Expansion | Water forced into existing cracks | Over a few weeks |
| Discoloration | Sealant or top layer damage | Immediately |
If you spot any of these after giving the driveway a rinse, hold off on the next cleaning round until you sort out the problem. Fixing small stuff early on means you won’t end up paying for a brand-new driveway later.
If you want your pressure washing session to go well and your driveway to last, keep it simple and follow some solid rules. Here’s how to get those results—without coming back to cracks or flaking concrete.
By the way, a recent survey among DIY homeowners found that over 40% of accidental driveway damage came from using too much pressure. That’s a lot of busted surfaces just from being in a rush or picking the wrong settings.
| Surface Type | Recommended PSI | Nozzle Angle |
|---|---|---|
| Concrete | 2,500 - 3,000 | 25-40 degrees |
| Brick | 1,500 - 2,000 | 25-40 degrees |
| Asphalt | 1,200 - 1,500 | 40 degrees |
Follow these tips, and your driveway will handle regular cleanings without any nasty surprises—or expensive repairs.
When pressure washing feels too risky for your driveway, it’s worth looking at other ways to get the job done. Some methods get surprising results without the downsides—especially if you’ve got old concrete, bricks, or joints that don’t handle high pressure well.
One straightforward approach is a good scrub with driveway cleaner and a stiff-bristle brush. Sure, it’s not as quick as a pressure washer, but with the right cleaner—like a degreaser or one specifically for algae and mold—you can tackle stains and built-up gunk. Here’s what you need:
Just apply the cleaner, let it soak for a few minutes (as the label says), then work the surface with the brush. Rinse it all off with a standard garden hose. No concrete flying off, no etching, and way less risk of accidental damage—especially on pavers or stamped concrete.
If you’re dealing with oil spots, try cat litter or baking soda. Drop it right on the stain, let it sit a while to soak up the mess, sweep it up, and then finish with warm soapy water. Both are cheap and safe for the surface.
Eco-friendly cleaning is another solid option. Vinegar mixed with water hits many stains, especially green algae, without harsh chemicals. Just don’t expect miracles overnight. These methods take a little more elbow grease, but your driveway will thank you later.
Some folks even try hot water cleaning with a specialized attachment for hoses—not quite the punch of a pressure washer, but a big improvement over plain, cold water. Or, try a foam cannon that attaches to your hose and lets the cleaner work longer before rinsing.
| Method | Best For | Risk of Damage |
|---|---|---|
| Scrubbing with Cleaner | General grime, algae | Very low |
| Absorbent Materials | Oil stains | None |
| Eco Cleaners (Vinegar) | Light mold, algae | None |
| Hot Water Hose | Surface dirt | Very low |
The main point: skipping the pressure washing doesn’t mean dealing with a dirty driveway forever. With a little time and the right supplies, you can keep things looking sharp—and skip the repair bills.