End of tenancy cleaning is a rite of passage for many tenants. It's not just about leaving a place looking nice, it's vital for getting that deposit back in full. But where to begin? The thought of tackling an entire property can be overwhelming, whether you're dealing with stubborn kitchen grease or dust-ridden carpets.
Let's demystify the process. Breaking down the task into seven essential cleaning areas can make it more manageable. Today, I'm going to shed light on some tried-and-true methods that go beyond the usual scrub and sweep. You'll learn which parts of the home often go unnoticed yet make a big difference. Prepare to embrace cleaning secrets that will help guarantee your departure is as smooth and spotless as possible.
End of tenancy cleaning is more than just a quick dust and mop; it’s a comprehensive process that ensures a rental property is returned to its original condition. This type of cleaning is essential because it not only helps tenants reclaim their full deposits but also keeps a good relationship with landlords or real estate agents. It involves a deeper level of clean than everyday housekeeping, covering nooks and crannies we often overlook. Tenants moving out should focus on every aspect of the home—from the tops of the cabinets to the undersides of furniture. Some mistakenly think they can get away with cursory cleaning, but missing key areas can lead to disputes and financial loss.
Each room requires attention to detail and specific techniques to achieve the desired results. For instance, kitchen cleaning involves degreasing not just the visible stovetop or oven but also inside cupboards and behind appliances. It’s about tackling the build-ups that quietly form over time. Bathrooms, known for moisture and potential mold, need a full top-to-bottom scrub. Real estate authorities often remind tenants with the adage, "Leave it better than you found it," a useful mantra to keep in mind during the process. Many property management companies now provide detailed checklists to ease this transition. Following these guidelines can significantly ease the stress of moving and ensure you don’t overlook those all-important details.
A statistic often cited in property management circles is that disputes over cleanliness account for more than half of all deposit deductions. This fact highlights how critical it is to perform an end-of-tenancy cleaning correctly. The stakes are high, but with diligent planning and perseverance, the task becomes manageable. The goal is not merely to clean but to present a space that is fresh and welcoming for future occupants. Consider it akin to staging a home for sale; everything must look and feel inviting. Cleaning also uncovers potential maintenance issues that might need attention, which can be beneficial for both tenant and landlord.
One interesting approach is the use of professional cleaning services. These professionals specialize in end-of-tenancy cleaning, armed with expertise and tools for even the toughest jobs. While it adds a cost, it can save time and assures a quality result. As stated by cleaning expert Jared Nicosia, “A professional touch can often uncover the hidden grime that normal cleaning might miss.”
The experience of a seasoned cleaner is invaluable when it comes to tackling stubborn stains or achieving a streak-free finish that a tenant alone might struggle with.Having this option encourages many tenants to balance their time and effort against the potential cost of a professional service.
However, if you choose to go the DIY route, make sure to give yourself ample time to complete the task. Begin by creating a priority list based on the checklist provided by landlords or property managers. Break your work into manageable pieces, focusing on one room at a time. Many fail to appreciate the time it takes to do a good job; rushing could lead to missed spots and an unfavorable inspection report. The key is patience, precision, and a pragmatic approach. With each corner you turn, you're one step closer to a thorough and satisfying clean.
The kitchen, the heart of many homes, is often where the bulk of the end of tenancy cleaning magic needs to happen. With its many surfaces and frequent use, it can be a breeding ground for stubborn grease, lingering odors, and overlooked crumbs hidden in corners. This means a strategic approach is necessary to tackle these issues head-on. Start with the stovetop and oven, where most grime accumulates. Applying a mix of baking soda and vinegar can work wonders in breaking down tough stains. Allow the mixture to sit for a bit, giving it time to cut through the grease before scrubbing lightly. Moving on to the refrigerator, you might be surprised at the spills that can accumulate over time. Consider removing all shelves and drawers, washing them in lukewarm soapy water, and wiping down the interior. Don't forget to dust on top and behind to ensure it's spotless. Check the expiration dates before replacing items to ensure you're not putting back anything that's spoiled.
After handling the big appliances, it's time to pay attention to your kitchen cabinets and drawers. Dirt and grime can easily accumulate on handles and inside corners. One efficient method is using a gentle cleaning solution sprayed onto a microfiber cloth. Wipe all exterior surfaces and don't shy away from an old toothbrush for getting into the nooks. Keeping your sink and faucet gleaming is equally important. Lemon segments can be excellent for cutting through tough water spots on stainless steel. The fresh scent is a bonus! Finally, don't neglect your floors. Whether tiles or vinyl, a thorough mop will remove any remaining debris and leave a satisfying shine. If you have time, revisit the entire kitchen one more time to catch any spots you may have missed during your initial round of cleaning.
"The kitchen should be clean enough to be healthy, and messy enough to be happy." — Unknown
Having a robust cleaning strategy can make all the difference when focusing on the kitchen. The process doesn't merely end with cleaning known surfaces. Attention to detail can transform any kitchen from dull and overused to sparkling and fresh. Consider adding a few drops of essential oil to your mop water for an inviting scent and to ward off any unwanted pests. If your kitchen includes a dishwasher, running a cycle with a dedicated cleaning agent can help prevent any residue build-up that can lead to odors. Don't forget the small things! Socket faceplates, light switches, and under-cabinet areas can harbor dust and grime unseen at first glance. For food-related stains, a paste made from salt and water can often work wonders and doesn't require harsh chemicals. Lastly, creating a cleaning checklist specific to the kitchen can provide a visual reminder of what needs attention and help to avoid overlooking anything important.
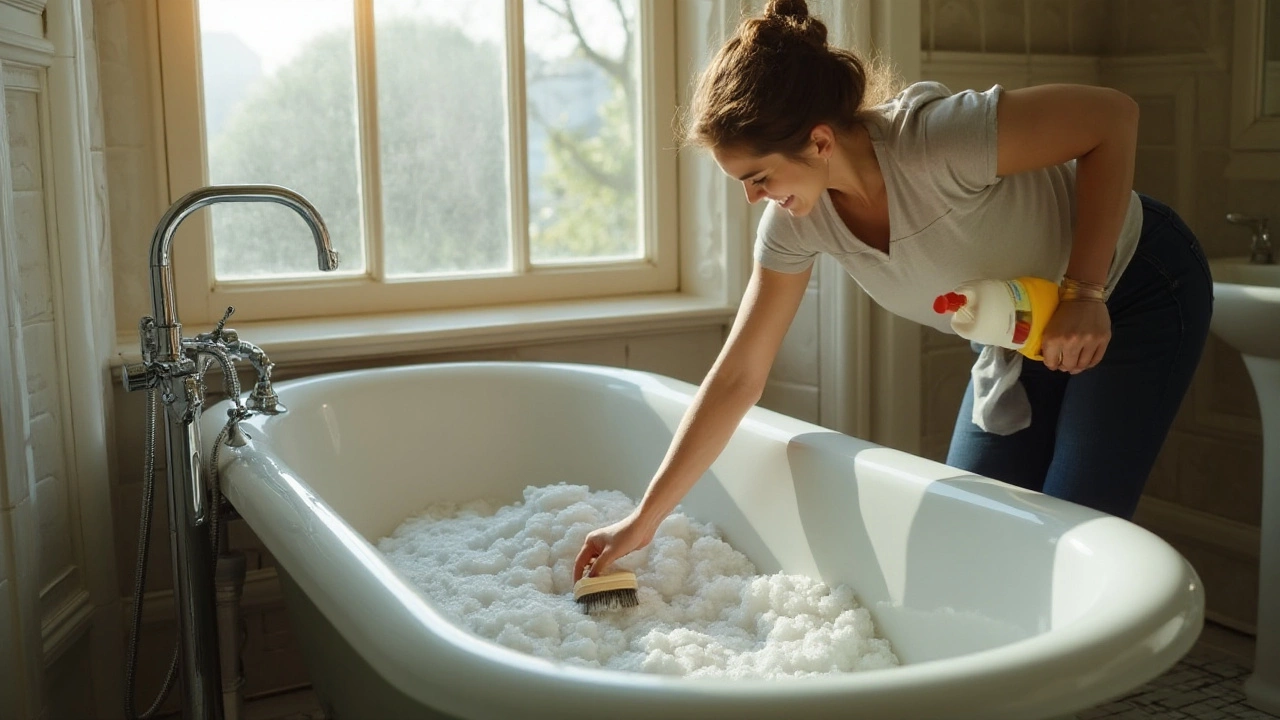
Tackling the bathroom during an end of tenancy cleaning can often feel like a battlefield. It's the one room that accumulates the most resilient grime and requires meticulous attention. This space is usually small, yet packs a punch in terms of the cleaning effort needed. Let's break down the secrets to making your bathroom sparkle like it's fresh out of a fancy hotel brochure.
Start with the fixtures—the sink, taps, and shower. Lime scale buildup is a common adversary in bathrooms, especially in areas with hard water. An effective trick is to soak a cotton cloth in vinegar and wrap it around the affected taps. Let it sit and work its magic for at least 30 minutes. Not only does this dissolve mineral deposits, but it also leaves the metal gleaming. Remember, the key to cleaning tips that work is patience and the right combination of products.
The next monster in line is mold, which loves to rear its ugly head in the grout lines and often hides in corners. A homemade bleach solution, carefully applied, can work wonders. Leave it for about ten minutes before scrubbing with an old toothbrush. This small tool is perfect for getting into the nooks of grout that are often neglected. It's important to ensure proper ventilation while working with bleach by turning on the bathroom fan or opening a window.
Of course, don't forget the toilet, the throne room's centerpiece. It might seem obvious, but people often overlook cleaning the base and exterior of the bowl. Use a dedicated toilet brush for the interior and a sturdy scrubber for the exterior surfaces. Consider giving the toilet a good first scrubbing, applying cleaner, and then leaving it to sit while tackling other surfaces.
While cleaning the bathroom, remember the mirrors! There's nothing like a streak-free shine to make the space look larger and brighter. A simple solution of water and vinegar sprayed on and wiped off with a microfiber cloth usually does the trick. However, when you're in doubt, crumpled newspaper can achieve a streak-free polish too.
According to Martha Stewart, "A simple squeegee in the shower can prevent build-up on glass, tiles, and even in the corners of the tub."
If you've got a bathtub or a shower, keep an eye on the drain. Hair accumulation causes water to linger longer than it should, leading to not just bad smells, but potentially even property damage due to clogs. Use a mixture of baking soda and vinegar as a natural, effective drain cleaner.
With these focused efforts, you'll soon appreciate the art behind a truly shiny bathroom, which plays a huge part in ensuring your rental property is left spotless. Cleanliness is next to godliness, they say, but in this case, it's certainly next to deposit retrieval. So heed these wise cleaning strategies and watch how they transform your most stubborn spaces into an embodiment of cleanliness.
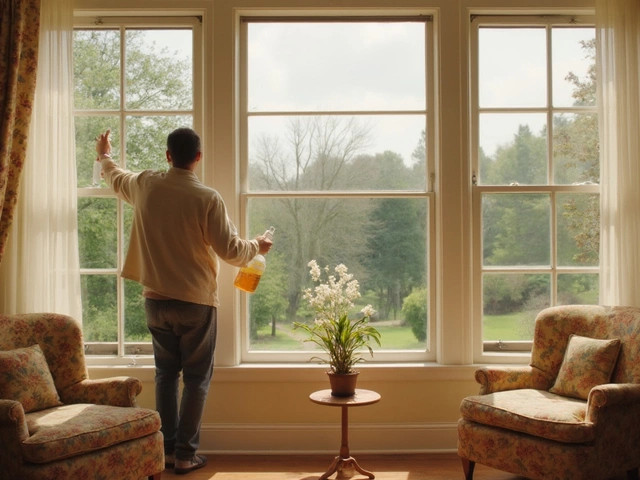
When it comes to end of tenancy cleaning, the living room and the bedroom are often seen as the heart and sanctuary of any rental property. These spaces must emanate cleanliness and a fresh appeal to impress landlords and potential new tenants. Start with a declutter; removing personal belongings often amplifies the open space and untangles the room's character. Lampshades, photo frames, and even the odd forgotten item behind the couch should find their way back to their correct spots. This first step is less about cleaning and more about preparing a blank canvas for your hard work to shine. Take a moment to clear out the cobwebs, literally. Even the most pristine homes can harbor these sneaky dust collectors in corners or around ceiling vents, making it crucial to go over such sneaky spots with a long-handled duster.
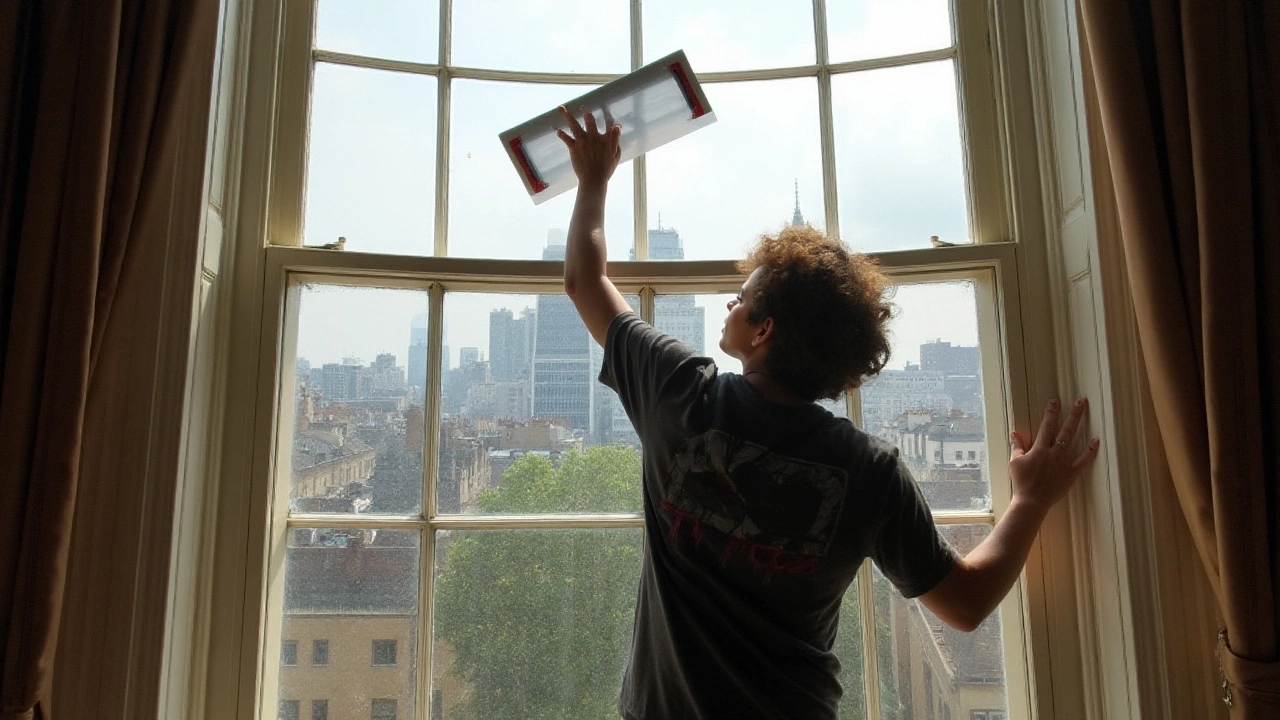
Next on the list is dusting, a task many overlook but is incredibly important for both aesthetics and health. Dust every surface with a microfiber cloth, which traps particles better than its paper or cotton counterparts. Pay attention to the tops of wardrobes, door frames, and even curtain rods. These spaces, though out of sight, can accumulate significant dust over time, especially in seldom-cleaned rental spaces. This leads us to mirrors and windows; these are, after all, the eyes of the room. Mix equal parts of water and vinegar in a spray bottle to tackle streaks and residue effectively – it's an age-old trick that never fails. As you clean, let the fresh air stream through open windows, reinvigorating the spaces and helping to dry freshly cleaned surfaces quicker.
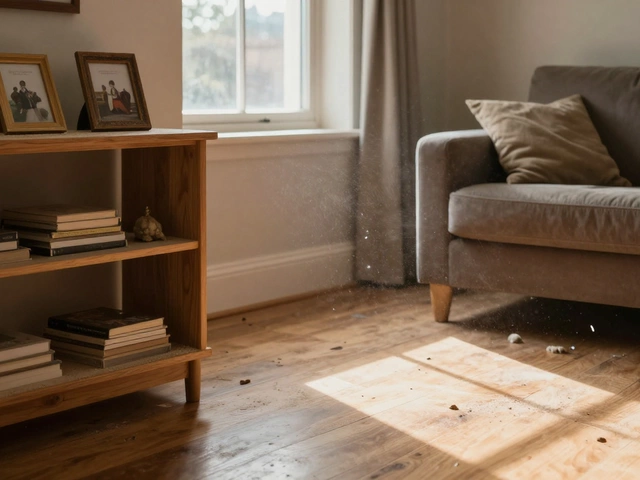
Cleaning the floors should ideally be one of your last tasks, ensuring dust from above doesn't find its way back to the ground post-cleaning. Carpets generally hide more than what's visible; they are secret keepers of dirt and grime. A high-performance vacuum does a great job but isn't always enough for end of tenancy standards. If possible, hire a steam cleaner or arrange for a professional service, especially if persistent stains sulk beneath the surface. Wooden floors or tiles, on the other hand, require a gentle touch. A mixture of warm water and mild detergent, mopped in the direction of the grain, works wonders. Throw in a promise of added shine with a little touch of olive oil post-mopping, it's an extra step guaranteed to leave floors glowing.
Finally, ensure every nook and cranny is as fresh as a daisy. Behind furniture, under beds, and around baseboards are often overlooked but host a significant portion of dust and deep-seated dirt. Move furniture whenever necessary to vacuum or mop hidden spaces. The effort put in here can often be the tipping point between a lost deposit and a happy final inspection. For the ultimate success story, top off with a subtle air freshener; lavender or bergamot are popular choices, known for their soothing unwind and revitalizing effects respectively. Remember, you're not aiming to cover up smells but to maintain a lasting, faint fresh scent that reaffirms the rooms have been immaculately dressed and are ready to greet their next occupants.
When it comes to end of tenancy cleaning, the floors and carpets play a pivotal role in ensuring the property's appeal and cleanliness. Digging deep into the fibers of your carpet and reaching every nook of your wooden or tiled surface requires more than just a regular mop and vacuum. A smart approach is often needed, and yes, it can make the inevitable process less nerve-wracking. Let's dive into the specifics of caring for your floors and carpets to leave a lasting impression.
Firstly, tackling carpets involves a bit of science and strategy. Carpets are notorious for hiding dust, allergens, and an assortment of stains faster than your dog Sable can wag his tail. To start, it's best to vacuum thoroughly. A wise method is to use different angles and multiple passes over high-traffic areas, as it helps to loosen packed dirt. If there are visible stains, a mix of baking soda and vinegar can serve as a potent homemade remedy. Generously sprinkle the baking soda over the stain, spray white vinegar lightly, and allow this concoction to bubble away impurities. Once dry, a good vacuum pass will reveal a surprisingly fresh carpet.
As Mary G. Lasker famously said, "I am opposed to cleaning carpets. They should just grow the way nature intended." Though light-hearted, it underscores the fact that many of us overlook the importance of regular carpet care in maintaining the fresh look of our homes.
Now, onto the robust surfaces – wooden floors can often require a more nuanced touch. Begin by dusting or sweeping to remove surface debris, which can potentially scratch their sheen if overlooked. If you're dealing with hardwood, a gentle wood-cleaning solution diluted in water does wonders to restore the wood's natural radiance without the risk of damage. Remember, never leave standing water on these floors, as wood and water are never a match made in heaven. Microfiber mops serve well to polish well-maintained wood without being too abrasive.
When the challenge extends to tile floors, grout is usually the uphill battle. A mix of hydrogen peroxide and baking soda can make a formidable grout cleaner. Apply it using an old toothbrush to scrub away evidence of all previous tenants' forgotten messes. Often overlooked, buffing the tile post-cleaning with a soft cloth helps enhance its shine, channeling glistening highlights that reassure landlords of their property's pristine condition.
For a more structured approach, divide your space into sections to engage systematically. The following list outlines steps to conquer floor care:
And here’s a quick reference table, reflecting cleaning frequency patterns you might consider adapting:
| Floor Type | Recommended Cleaning Frequency |
|---|---|
| Carpet | Weekly vacuum; seasonal deep clean |
| Wood | Weekly dust; monthly polish |
| Tile | Bi-weekly scrub; bi-annual deep clean |
Proper end of tenancy cleaning on your floors and carpets can be an essential step in transitioning smoothly out of the current dwelling, while making sure you leave no stone unturned or dust bunnies behind. These efforts not only assure landlords of your diligence but can potentially impact your ability to reclaim your deposit in full. And let's face it, a spotless carpet and gleaming floor speak volumes about a tenant's dedication to cleanliness and respect for the property's care.