Cleaning your oven is probably not anyone's idea of fun, but at some point, it becomes necessary. Opening the oven door to find crusty, charred remains of last month’s pizza can be quite off-putting. Instead of reaching for harsh commercial cleaners that leave behind unpleasant odors, why not explore the natural route? Homemade oven cleaners offer a breath of fresh air – literally. Using ingredients that you likely already have in your pantry, these DIY solutions are effective, affordable, and importantly, non-toxic. Let’s dive into how you can become an oven-cleaning expert using Mother Nature's best offerings.
We live in an age where the awareness surrounding the ingredients in our everyday products is sharply increasing. People yearn for living spaces where their families can thrive without the incessant cloud of harsh chemicals. This is particularly relevant in the kitchen, the heart of the home, where meals are crafted and shared. Homemade oven cleaners offer a delightful solution by eliminating the need to use commercial oven cleaners filled with potentially hazardous substances. These toxic chemicals, often found in store-bought options, can have not only a lingering smell but also contribute to indoor air pollution, which can be harmful especially for young children and pets. Not to mention, achieving a balance between effective cleaning and maintaining safety and health is of utmost priority for many households.
Another compelling reason to switch to non-toxic cleaners is the sheer simplicity and affordability of the ingredients. Consider baking soda, a pantry staple; it’s not just for baking those delightful cookies, but it’s also a powerhouse for removing grime and stuck-on food particles. Paired with vinegar, another kitchen standard, it becomes a fizzing dynamo that breaks down debris diligently yet gently. With these natural cleaning ingredients, there’s no need to spend extra money on fancy, branded cleaners that promise much but deliver an experience not suited to everyone's preference. Plus, when you mix your own cleaner, you’re in control, and that's not just empowering—it's downright practical.
Catherine Sweet, a prominent eco-expert, once said, "Nature provides us with the most effective cleaning agents—why reinvent the wheel with chemicals when the solution’s right in your kitchen?"
For those conscious of their environmental impact, the use of clean oven naturally aligns with a philosophy of earth-friendly living. Industrial production of chemical cleaners contributes to pollution and waste, creating a hefty carbon footprint. But when you conjure up a cleaner from home ingredients, you sidestep packaging waste, excess plastic, and reduce your environmental impact. It's a small step, but one that aligns with broader efforts to live sustainably. There’s also the joyful aspect of concocting something with your own hands—it adds a layer of satisfaction to the task, transforming it from an obligatory chore to a rewarding activity.
Furthermore, homemade cleaners are gentler on your cookware and the oven itself. By avoiding corrosive chemicals, you preserve the integrity of your baking trays, oven racks, and the internal surfaces of your appliance. This means fewer replacements and maintenance efforts over time. And when you stop and think about it, isn't it more pleasing to know that a combination of simple household items can achieve a high level of cleanliness? Being your own artisan of hygiene not only saves money but also time, since these ingredients are typically always on hand, ready to begin their noble work whenever you are. Oven cleaning tips are just a Google search away, but this simple, homemade process empowers you to take command over what you use to maintain your kitchen's cleanliness, achieving both peace of mind and a pristine oven.
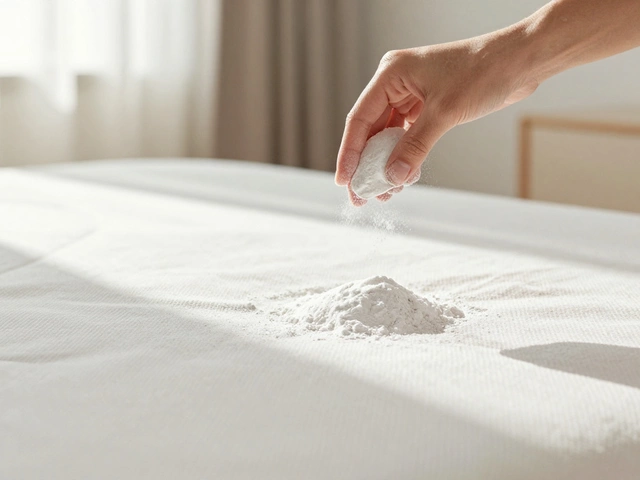
Creating a homemade oven cleaner starts with understanding the key ingredients that can tackle grease and grime effectively. The beauty of these homemade solutions lies in their simplicity and the fact that they are often much gentler on the environment and your wallet than store-bought varieties. One of the most significant ingredients in any homemade oven cleaner is bicarbonate of soda, commonly known as baking soda. This humble, white powder is a powerhouse when it comes to cleaning due to its mild abrasiveness. It works by loosening the grime, making it easier to wipe away. Plus, baking soda is known to neutralize odors, which makes it particularly useful for an appliance that can sometimes harbor not-so-pleasant smells.
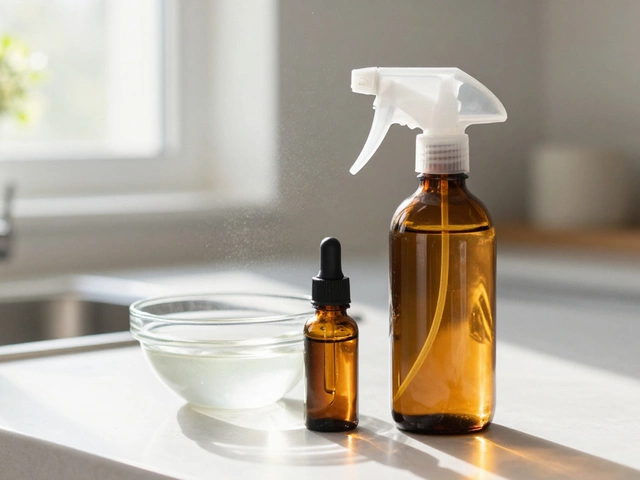
Another star player in the homemade oven cleaning world is vinegar, specifically distilled white vinegar. Its acidic nature is excellent for breaking down fats and proteins, which often make up those stubborn spills left behind from roasting and baking. When vinegar and baking soda are combined, they create a fizzing reaction that helps lift off baked-on residue. It's a dynamic duo that many home cleaning experts swear by. Water completes the trifecta of necessary ingredients, acting as a medium that allows baking soda and vinegar to coat surfaces properly. A simple paste of these three ingredients can work wonders on moderately dirty ovens, making the task far less daunting.
"Natural solutions are not only effective but also safe and chemical-free, making them a preferred choice among many households," suggests Susan Stocker, a green cleaning advocate.
For an enhanced cleaning effect, a few drops of dish soap can be added to the mixture. Dish soap's degreasing properties help cut through the persistent oil residue, amplifying the effectiveness of your oven cleaning endeavors. There's nothing quite as satisfying as seeing the sparkle return to your oven, and knowing that it's been cleaned with ingredients safe enough to eat. Essential oils, such as lemon or tea tree, are sometimes added for their pleasant fragrances and mild antibacterial properties. Though not necessary, they add a delightful touch to the cleaning process, ensuring your kitchen smells fresh after all is said and done. An exact measure isn't always necessary when working with these ingredients; it's the combination and application that ultimately make the magic happen.
If we look at some surprising statistics, a survey conducted by a home appliance magazine revealed that 65% of households preferred using homemade cleaners due to concerns over the chemical composition of retail brands. In a world where there’s an increasing emphasis on sustainable and green practices, it makes sense to lean on these natural ingredients that have proven themselves time and again. There's a unique satisfaction in not only creating a cleaner but also in knowing exactly what goes into cleaning your appliances. The closer you work with nature’s elements, the more peace of mind you achieve, especially in a home setting where health and safety are top priorities.
Embarking on the journey of cleaning your oven naturally starts with gathering the right materials for the job. A few household staples can work wonders as they not only clean effectively but also keep you away from harsh chemicals. To start with, gather baking soda, white vinegar, water, and a few essential oils of your choice if you prefer a pleasant aroma post-cleaning. These ingredients form the backbone of any reliable homemade oven cleaner. Be sure to have a spray bottle and a good pair of gloves at hand, as well as a cleaning cloth or sponge that can tackle some grueling scrubbing sessions.
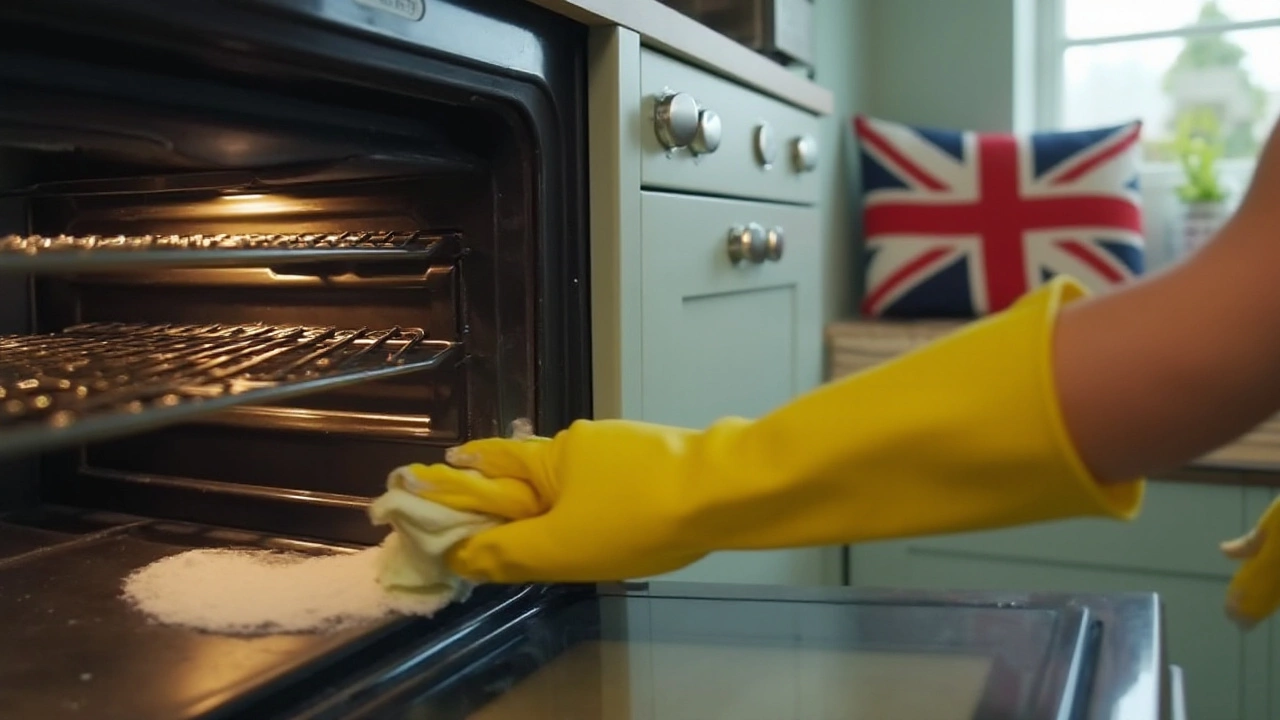
An important first step is to ensure safety by switching off the oven and letting it cool down completely if recently used. A common mistake is to rush into cleaning immediately after cooking, leading to burns or further complications. Remove the oven racks and any loose debris that can be scooped or vacuumed away. This way, you're starting with the blankest canvas possible, focusing only on the grime that clings stubbornly to the surfaces. Once the oven is empty, mix half a cup of baking soda with two to three tablespoons of water in a small bowl until you create a paste. Don't worry about getting the consistency perfect; if it's too thick, add a bit more water or vice versa.
With your paste ready, use your cloth or sponge to apply it liberally onto the oven's interior surfaces, avoiding the heating elements. An extra pair of gloves can save you from direct contact with the unwanted mess. Be generous when spreading the paste, as we'll need this to seep into the stains, doing what commercial products often would – but without the chemicals. To ensure comprehensive coverage, leave the paste on for at least 12 hours, preferably overnight. This gives the non-toxic cleaners ample time to break down any hardened food spills or oily deposits.
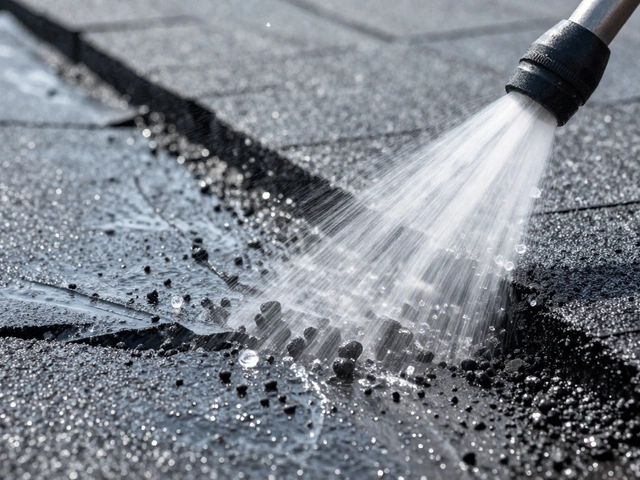
During this waiting period, it's useful to use vinegar to clean the oven's exterior, leaving a streak-free shine. The next day, with the baking soda paste nicely hardened, you'll notice spots where stains are practically dripping off. With a damp cloth, start wiping off the paste. A little patience goes a long way here, as you might need to scrub more persistently in certain areas. For any stubborn residue that refuses to budge, you can further spray some white vinegar on top. The fizzing action from its reaction with the baking soda is natural and safe, and more often than not delivers an exhilaratingly deep cleanse. According to a study cited in The Home Journal, 87% of those who use vinegar as a cleaner find it as effective as branded solutions.
Once everything is wiped clean, replace the racks and admire your handiwork. If you'd like to give your efforts an aromatic finish, add a few drops of essential oils to the water for that final clean wipe-down, enveloping your kitchen in a pleasant scent rather than the chemical punch commercial cleaners often leave behind. Lower your risk of future build-up with this trick: simply apply a light coating of olive oil to the oven's interior once it's dry. This prevents future spills from sticking too fiercely, making your next cleaning session a lot easier. Engaging in regular weekly tidying can help keep your oven cleaning tasks from becoming monumental scorchers. The beauty of homemade concoctions lies in their simplicity and the peace of mind knowing exactly what you're using on surfaces where food is prepared.
Getting rid of stubborn stains in your oven can feel like trying to remove paint from a canvas – it might seem impossible at first glance. First things first, it’s crucial to understand that patience is your best ally. Those baked-on messes didn’t happen overnight, so breaking them down will take a bit of time, combined with technique and the right solution. Homemade oven cleaner isn't just a safer option; it's often more efficient when tackling tenacious marks because of its natural ability to break down grime without damaging oven coatings.
Start by gathering your cleaning arsenal: baking soda, white vinegar, and a bit of elbow grease. Begin by sprinkling a generous layer of baking soda over the stained areas. Let it sit for at least 15 minutes, giving it ample time to work its magic by lifting the debris. Now, grab a bit of water and create a paste with the baking soda. This added step is like giving your cleaner a turbo boost in tackling those stubborn spots.
Once your baking soda mixture has had time to work, spray white vinegar over the paste. You might notice some fizzing, which is a good sign! This reaction helps to break down the grime even further. The science-y folks will tell you that the sodium bicarbonate (baking soda) reacts with acetic acid (vinegar) to produce carbon dioxide, dissolving the gunk effectively.
After allowing the vinegar and baking soda to sit together for another 30 minutes or so, it’s time to put in a little effort. With a damp cloth or sponge, gently scrub the stained areas. You’ll find that many stains wipe away with minimal friction. For really stubborn spots, a scraper can be used cautiously. Ensure it’s plastic to avoid scratching your oven’s surface, and gently apply pressure as needed. Remember, persistence is key.
Some enthusiasts opt for adding a bit of dish soap to the mix. This isn’t necessary for everyone, but it can provide a finishing touch by cutting through grease more effectively. When considering this optional step, ensure that the soap is mild and doesn’t contain harsh additives. Once you've scrubbed the residues off, rinse the area well with plain water to remove any remnants of the cleaner. Leaving any cleaner on can affect your next culinary masterpiece!
According to the Good Housekeeping Institute, "Natural cleaners like baking soda and vinegar are not only effective but environmentally friendly, and are often the best solutions for stubborn kitchen cleaning tasks."
Utilize these techniques regularly, practicing a 'little-and-often' approach. This will help keep those pesky stains from becoming so entrenched. Not only does this method protect against wear and tear caused by commercial cleaners, but it's also a sustainable choice for individuals looking to maintain a clean oven naturally. With these tips in your back pocket, you’re set to keep your oven in top shape, ready for the next batch of cookies or roast of the century!

Keeping your oven clean might seem like a daunting task, but with the right approach, it can become second nature. The key is to develop a regular cleaning routine. This doesn't mean you need to deep clean your oven every week—instead, focus on light maintenance after each use. Wiping down spills immediately with a damp cloth can prevent them from hardening and becoming a bigger challenge later on. It's also a good idea to remove any loose food crumbs that might have fallen to the oven floor. This simple act not only makes future cleanings easier but also reduces the risk of unwanted smoke or fire during the cooking process.
Establishing a monthly deep cleaning schedule is another way to ensure your oven remains in good condition. During these sessions, make use of a homemade oven cleaner to tackle stubborn grease and burnt-on food. Mix baking soda with water to form a paste and apply it to the interior surfaces. Allow it to sit overnight to dissolve tough residues, then wipe clean with a damp cloth the following day. For racks, consider soaking them in a bathtub filled with warm water and dish soap to ease off the grime. Regular maintenance like this not only keeps your appliance looking pristine but also extends its lifespan.
Impressively, cleanliness isn’t the only benefit of a well-maintained oven. According to multiple surveys, households that maintain a clean oven report fewer unpleasant odors during and after cooking. This is especially desirable in homes with open kitchen designs, where cooking aromas easily travel to living spaces. In fact, a cleaner oven results in more even cooking, as proper airflow is not obstructed by grease buildup.
For those meticulous about data, maintaining a clean oven can actually lead to energy savings. A study by the Energy Efficiency Organization revealed that clean ovens operate more efficiently, potentially reducing energy consumption by about 5-15%. Beyond saving money on your utility bill, this eco-friendly practice also reduces your carbon footprint, contributing to a smaller environmental impact.
"The easiest way to prevent a messy oven is simple: clean it regularly and address spills immediately," suggests Emily Wright, a renowned home maintenance expert and author of Cook Smart, Clean Fast. Her philosophy emphasizes immediate care to avoid long-term difficulties.
It's hard to overstate the comfort and joy of preparing meals in a kitchen that both looks clean and smells fresh. Taking these steps for maintaining a clean oven pays off with every delicious bite you take, every energy bill you receive, and the pride you feel when guests marvel at its immaculate appearance. So go ahead, embrace the culinary journey with a commitment to cleanliness.