Select your surface material and the specific stain you need to remove to get the safest and most effective cleaning recommendation.
Never let cleaning solutions dry on the surface. Spray gently, wait 5-15 minutes, then rinse. For vertical surfaces, keep them wet to prevent residue.
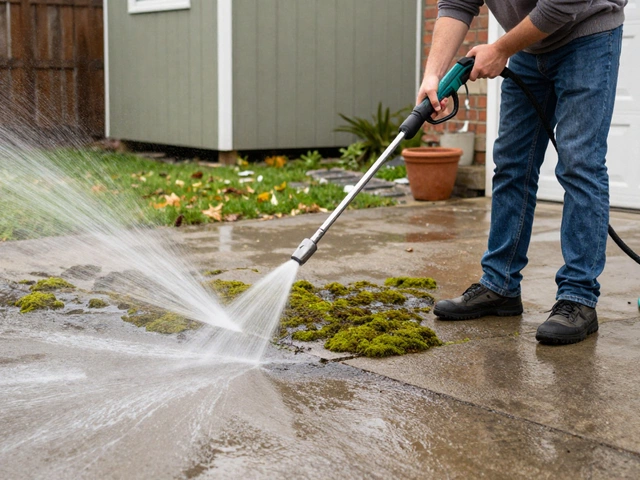
Water does only so much when you try to power through tough grime. You might be tempted to crank up the pressure dial until the dirt vanishes, but that often strips paint or etches wood. The real secret lies in what you add to the water tank or apply before spraying. Choosing the right cleaning solution changes the job from a physical battle into a chemical reaction that lifts the dirt away safely.
This guide cuts through the marketing noise found on bottle labels. We will look at specific chemical types, how they interact with your home's exterior materials, and exactly how to mix them without damaging your equipment or the environment. Whether you are tackling black mold on a vinyl fence or oil stains on a driveway, the chemistry behind the liquid matters more than the nozzle setting.
Before buying a bottle, identify what you are actually trying to remove. Different soil types require different chemical mechanisms. A solution designed for grease will likely leave organic growth like algae untouched, and vice versa. Understanding this distinction prevents wasted money and unnecessary scrubbing.
If you treat organic growth with a degreaser, you will simply rinse the top layer off while the roots remain alive. They will grow back within weeks. Conversely, using an acid cleaner on a greasy patio won't do much. Identify the enemy first.
The safest pressure washer solution means nothing if it destroys the material underneath. Some surfaces can handle caustic cleaners; others dissolve upon contact. You must treat your driveway differently than your historic brickwork.
Concrete and Brick: These materials are incredibly durable. They generally tolerate higher pH levels, meaning you can use stronger alkaline cleaners to tackle grease and heavy grime. However, older mortar joints can be sensitive to harsh acids used for efflorescence removal.
Wood Decks: Wood is highly susceptible to damage. Strong bases can raise the grain, causing the wood fibers to stand up rough. Acids can strip natural oils, leaving the wood dry and prone to rot. For cedar or pine, you typically need neutral pH oxygenated cleaners or dedicated wood brighteners.
Vinyl Siding: Plastic and vinyl degrade under high heat and certain harsh solvents. Never use straight bleach on white vinyl, as concentrated chlorine can yellow the plastic over time. A diluted soft-wash blend works best here.
Painted Surfaces: Paint acts like a delicate skin. If you scrub too hard or use a solvent-based cleaner, you strip the topcoat. Stick to low-detergency cleaners that lift dirt without penetrating the sealant.
| Surface Type | Recommended Chemical Type | Chemicals to Avoid |
|---|---|---|
| Concrete | Alkaline Degreasers, Mild Acids | Muriatic Acid (undiluted) |
| Wood Deck | Oxygen Bleach, Soap | Chlorine Bleach, High-Pressure Acid |
| Vinyl Siding | Sulfamic Acid, Soft Wash Mix | Strong Chlorine, Solvents |
| Roof Tiles | Bio-cide Solutions | High pH Cleaners |
| Stone/Pavers | Neutral pH, Enzymatic | Strong Acids |
Always perform a spot test in an inconspicuous area. Pour a small amount of the mixed solution on the corner of a step or a hidden siding panel and wait ten minutes. Check for discoloration or texture changes before applying it to the whole area.
When you read labels, you will see terms like "alkaline" or "oxidizing." These describe the active ingredients working against the dirt. Knowing these helps you shop smarter regardless of the brand name.
1. Alkaline Cleaners (High pH)
These are the workhorses for grease and oil. Think of them as soap on steroids. They saponify fats, turning them into a substance that mixes with water. Tri-Sodium Phosphate (TSP) is a classic example, though many modern formulations are TSP substitutes due to phosphorus bans in some regions. Use these for driveways where cars leak fluid, or kitchen areas near patios where cooking grease accumulates. Keep them away from painted surfaces, as high pH can soften latex paints.
2. Acidic Cleaners (Low pH)
Acids eat away minerals. If you have gray calcium deposits (efflorescence) seeping out of concrete blocks, or iron spots on bricks, an acid is necessary. Citric acid and sulfamic acid are gentler options found in consumer-grade products. Oxalic acid is excellent for removing rust stains specifically. Be careful with acids on natural stone like limestone or marble, as they will etch the surface instantly.
3. Oxidizing Agents
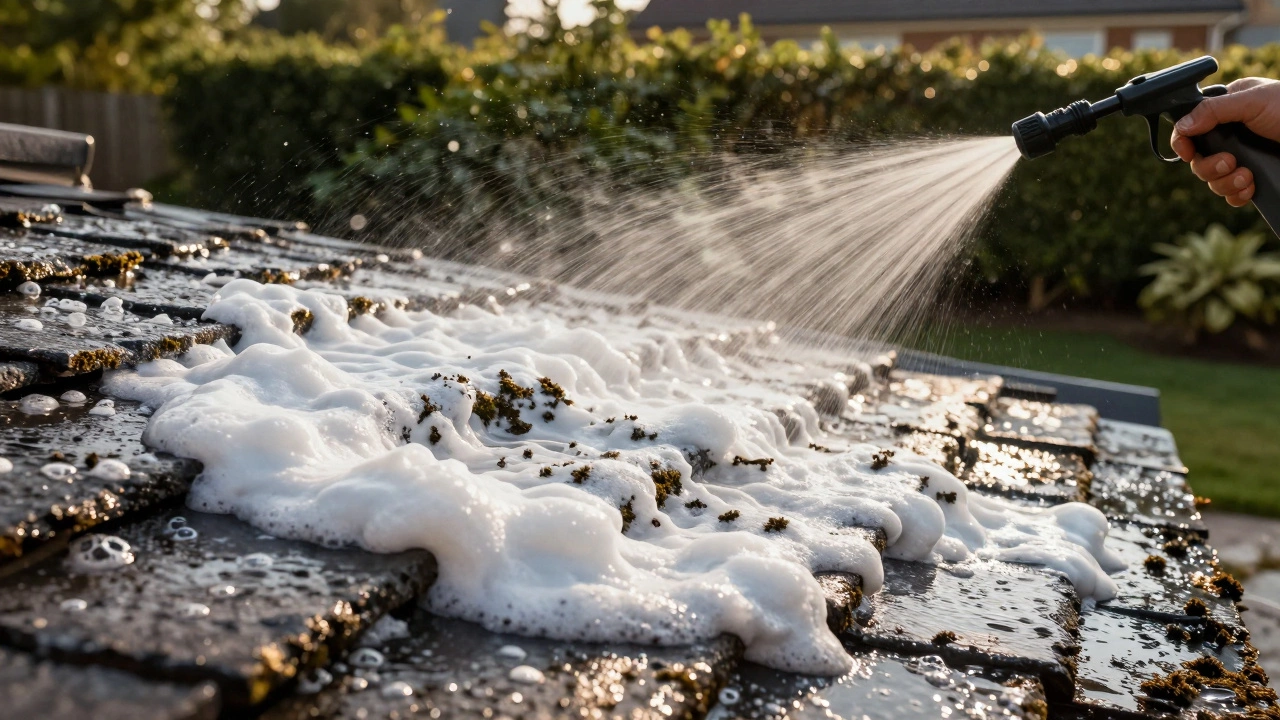
Sodium Hypochlorite (liquid bleach) and Sodium Percarbonate (powdered oxygen bleach) fall into this group. They break down organic matter by releasing oxygen atoms that react with cell walls. Bleach kills mold and algae quickly, making it ideal for roof moss or black streaks on vinyl siding. Oxygen bleach is safer for plants and wood but requires longer dwell times to activate fully. It turns green plants brown less frequently than chlorine bleach.
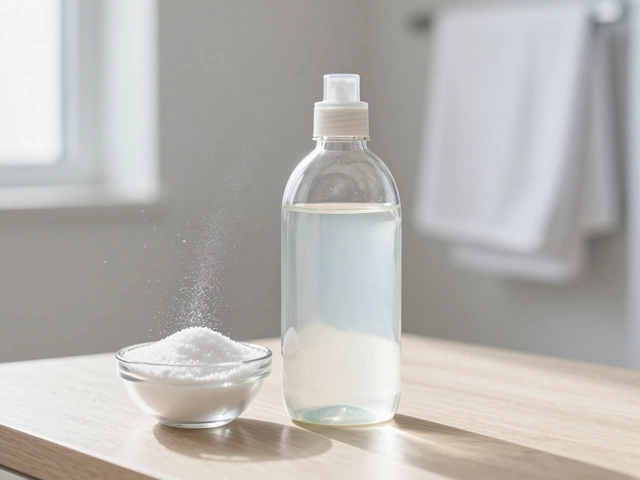
Many people turn to homemade recipes to save money. While mixing your own is satisfying, it carries risks regarding measurement accuracy and chemical stability. Commercial concentrates are engineered for the pump seals inside your machine.
Dish Soap Method: Mixing standard dish detergent with water creates foam. While great for hand washing dishes, it produces massive amounts of suds in a pressure washer. This foaming can clog the intake filter and flood the pump with air bubbles, leading to cavitation damage. If you use detergent, choose a non-foaming variety labeled for machinery.
Vinegar and Water: White distilled vinegar is mildly acidic. It works well for light mineral buildup. Dilute it 1:1 with water. Do not put this directly into the soap tank of a metal pump unit for extended periods; the acidity can corrode aluminum internals over time. Apply it via a garden sprayer instead.
Bleach Warning: Adding full-strength chlorine bleach to a gas pressure washer pump is dangerous for the rubber O-rings and seals. Most pumps cannot handle high concentrations of oxidizers for more than short bursts. Always dilute bleach significantly (usually 1 part bleach to 10 parts water) and run fresh water through the system immediately after.
If you buy a pre-mixed product, ensure it comes in a bottle marked compatible with chemical injector systems. Generic industrial cleaners might contain solids that settle out and block your narrow injector tubes.
You cannot spray chemicals and expect instant results. The magic happens when the solution sits on the surface. This is called "dwell time." In most cases, you should spray the cleaner on gently-using the lowest pressure setting or a simple garden hose attachment-and let it sit for 5 to 15 minutes.
Never let the cleaning solution dry on the surface. As the water evaporates, the chemical concentration increases, potentially burning the material. If you are working in direct sunlight, stay ahead of the drying process. Mist the area lightly with plain water to extend the dwell window if the chemical seems to be vanishing too fast.
For vertical surfaces, gravity works against you. You may need to agitate the solution slightly with a brush to help it penetrate crevices. Horizontal surfaces like paties benefit from the longest dwell times since the liquid pools naturally.
How you introduce the chemical affects its performance. Using the wrong method wastes product and strains your equipment.
Avoid the "trigger gun" soap tanks included on some cheaper machines. These rely on suction created by the water flow. Once you release the trigger to go back to high pressure, the flow dynamics shift, often stopping the chemical injection mid-job.
Cleaning chemicals enter the storm drains eventually. In many municipalities, discharging strong detergents or untreated runoff into public drainage systems is illegal. Before starting, check local regulations regarding phosphates and bleach.
Protecting Vegetation: Even "plant-safe" chemicals can harm sensitive flora if applied heavily. Rinse plants thoroughly with a hose before applying any cleaner. Wetting the leaves first creates a protective barrier that sheds the chemical rather than absorbing it.
Personal Protective Equipment (PPE): When handling concentrated chemicals, wear nitrile gloves, eye protection, and long sleeves. Splashes of acid or concentrated base cause immediate burns. Have a designated station for rinsing your hands located upwind from the work zone.
Store all liquids in their original containers. Transfering chemicals to soda bottles or unlabeled jugs is dangerous and can lead to accidental ingestion or confusion later.
Sometimes you finish the job and see a white haze or rainbow sheen. This indicates leftover chemical residue. It usually means you didn't rinse sufficiently or the water was too hard to dilute the remaining particles. Scrub the affected area with a clean rag and warm water to remove the film.
If you see streaking, check your nozzle. Worn nozzles create uneven patterns, causing chemicals to linger in some spots while rinsing completely in others. Replace worn tips regularly to maintain even distribution.